Design
The design characterizes the general principle of the optical system of the telescope.
—
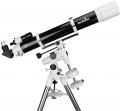
Lens (refractors). As the name implies, in such telescopes, a system of lenses is responsible for building the image. Their main advantages are simplicity of design and use, as well as unpretentiousness to shaking, shock and adverse weather conditions (which facilitates outdoor use, including in the cold season). On the other hand, this scheme of operation requires the use of long tubes, which accordingly affects the dimensions of the structure, and the diameter of the lenses (see below) for refractors as a whole is noticeably smaller than for reflectors. In addition, lenses are subject to various distortions, in particular, chromatic aberrations, which lead to the appearance of colour halos and reduce image quality. However, modern telescopes often use various design tricks to neutralize these distortions. Refractors are well suited for observations of relatively close objects such as the
Moon or planets, as well as panoramic observations at a relatively low power. In addition, this option is considered optimal
for beginner astronomers, including children.
—
Mirror (reflectors). In telescopes of this design, the role of the lens is played by a concave mirror, which provides the main magnification of the image. The simplest and mos
...t popular reflex scheme — Newton's telescope — involves a combination of a concave main mirror with an additional flat one, which reflects the image into the eyepiece. There are other variations of reflectors, but they are much more complicated and expensive, and therefore they have not received distribution in amateur astronomy. Anyway, telescopes of this type, being simpler, cheaper and more compact than refractors, have larger lenses and are less prone to distortion, which makes it possible to obtain high-quality images of fairly distant objects. Their main disadvantage is delicacy and difficulty in handling. Thus, mirrors are sensitive to shocks and shocks, the optics need to be adjusted from time to time, and before starting observation, it is necessary to wait for temperature equilibrium — otherwise the difference in air temperatures in the tube and outside will lead to a loss of image clarity (the same "haze" effect that can be seen above hot asphalt on a summer day). Also note that most reflectors give distortions at the edges of the image (the so-called "coma"), which narrows the actual field of view and makes it difficult to use them for astrophotography. However, in many models this drawback has been corrected, in others it is possible to use corrective lenses and other similar accessories, due to which reflectors are still the most popular option among astrophotographers.
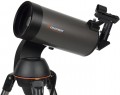
— Mirror lens. Such telescopes, in fact, are mirror models (see above), designed according to specific schemes and supplemented with corrective lenses to eliminate various distortions. Thanks to this, it becomes possible to further improve the quality of the "picture" compared to classical refractors, while at the same time retaining their main advantages — primarily compactness and relatively low cost. Among the mirror-lens models, there are also several different systems. Thus, Schmidt-Cassegrain systems are compact, inexpensive, and not as sensitive to small shocks as classical Newtonian reflectors; and the Maksutov systems (Maksutov-Cassegrain for close objects and Maksutov-Newton for distant ones) are somewhat more expensive, but are considered more advanced.Mount type
The type of mount the telescope is equipped with.
A mount is a mechanical unit with which the telescope is attached to a tripod or (in some cases) installed directly on the ground. In addition to mounting, this unit is also responsible for pointing the optics at a certain point in the sky. The most popular nowadays are
azimuth devices in different variations -
AZ1,
AZ2,
AZ3, as well as in the form of the so-called
Dobson mount.
Equatorial mechanisms of different models (
EQ1,
EQ2,
EQ3,
EQ4,
EQ5) are noticeably more complex and more expensive, but they provide more possibilities. There are systems that combine both of these types of mounts at once - the so-called azimuth-equatorial ones. And finally, some telescopes are supplied
without a mount at all. Here's a more detailed description of these options:
- Azimuthal. The full name is “alt-azimuth”. Traditionally, it has two axes of rotation of the telescope - one for pointing in altitude, the second in azimuth. Different models of such mounts differ in additional control capabilities:
- AZ1. They d...o not have a precision movement system.
- AZ2. Equipped with a system of precise vertical movement (around the horizontal axis).
- AZ3. Equipped with precision movement systems on both axes.
In any case, the second axis (azimuthal) in such systems is always located vertically, regardless of the geographical location of the telescope; This is the key difference from the equatorial mounts described below. In general, azimuth mechanisms are quite simple and inexpensive in themselves, while being quite convenient and practical, which is why this option is the most popular in our time. In addition, they are ideal for observing ground objects. The key disadvantage of this option is its poor suitability for continuous “accompaniment” of celestial bodies (moving across the sky due to the rotation of the Earth). If in a correctly configured equatorial mechanism you need to rotate the telescope along only one axis, then in the azimuthal mechanism you need to use both axes, and unevenly. The situation can be solved using an auto-tracking system, but this function significantly affects the price of the entire device. And even its presence does not guarantee that the telescope is suitable for astrophotography at long exposures - after all, with such use it is necessary to ensure not only accurate movement along each individual axis, but also correction for image rotation in the frame (which is not provided in every auto-tracking system, and also increases the price more).
- Dobson. A specific variation of the alt-azimuth mounts described above, used almost exclusively in reflectors. It also provides two axes of rotation - horizontal and vertical. The key feature of the Dobsonian mount is that it is not designed for a tripod and is mounted directly on the ground or other flat surface; For this purpose, the design provides a wide, massive base. Such systems are excellent for Newtonian telescopes, in which the eyepiece is located in the front part: thanks to the low position of the tube on the mount, the eyepiece itself is at a fairly convenient height. Also, the advantages of “Dobsons” include simplicity, low cost and at the same time good reliability, making them suitable even for large and heavy telescopes. Among the disadvantages, we should note the poor compatibility with uneven surfaces, especially hard ones, like solid rock (while tripods used with other types of mounts do not have this disadvantage).
- Equatorial. Mounts of this type make it possible to synchronize the movement of the telescope with the movement of celestial bodies across the sky, resulting from the rotation of the Earth. The conventional vertical axis, responsible for rotating the telescope from side to side, in such mechanisms is called the right ascension axis (RA), and the horizontal (for pointing along the conventional vertical) is called the declination axis (Dec.). Before use, the equatorial mount is adjusted so that the right ascension axis is directed to the “celestial pole”, parallel to the axis of rotation of the Earth (“the celestial axis”); the specific inclination relative to the vertical depends on the geographic latitude of the observation site. This format of work significantly complicates both the design of the mount itself and the installation procedure. On the other hand, equatorial systems are ideal for long-term “accompaniment” of astronomical objects: in order to compensate for the movement of a celestial body due to the rotation of the Earth and keep the target in the field of view, it is enough to rotate the telescope around the RA axis to the right (clockwise), and with a clearly defined speed - 15° per hour, regardless of the vertical position of the object. This makes such designs ideal for astrophotography, including deep space objects that require long exposures. In fact, this does not even require a full-fledged auto-tracking system - a relatively simple clock mechanism that rotates the telescope around the right ascension axis is enough. The downside of these advantages, in addition to the mentioned complexity and high cost, is their poor suitability for large, heavy telescopes - as the weight of the instrument increases, the weight of a suitable equatorial system increases even faster.
As for the different models of such mounts, they are marked with an alphanumeric index, from EQ1 to EQ5. In general, the higher the number in the designation, the larger and heavier the structure itself (including the tripod, if supplied), the less suitable it is for moving from place to place, but the better it dampens vibrations and shocks. But the restrictions on the weight of the telescope are not directly related to the equatorial mount model.
— Azimuthally-equatorial. Mechanisms that combine two types of mounts. It looks like this: an azimuthal system is installed on a tripod, and an equatorial system is installed on it, in which the telescope is already mounted. This design allows you to use the capabilities of both types of mounts. Thus, the azimuthal mechanism is quite suitable for observing large celestial bodies in near space (the Moon, planets) and large areas of the sky (such as constellations), and it does not require complex preliminary settings. And for astrophotography or for viewing deep space objects at high magnifications, it is more convenient to use the equatorial system. However, in practice, such versatility is extremely rarely required, despite the fact that the combination of two types of mounts complicates the design, increases its cost and reduces reliability. So this option can be found in single models of telescopes.
- Without a mount. The complete absence of a mounting system in the kit does not allow using the telescope out of the box. However, it can be the best option in some cases. The first is if the customer wants to choose the mount at his own discretion, without relying on the manufacturer's decision, or even assemble it himself (for example, quite a lot of astronomers make their own Dobsonian systems). The second typical case is if the household already has a mount (for example, from an old telescope that has fallen into disrepair), and there is simply no need to overpay for a second one. In any case, when choosing such a model, you should pay special attention to the type of fastening for which the pipe is designed - compatibility with a specific mount directly depends on it.
Lens diameter
Telescope objective diameter; this parameter is also called "aperture". In refractor models (see "Design"), it corresponds to the diameter of the entrance lens, in models with a mirror (see ibid.), it corresponds to the diameter of the main mirror. Anyway, the
larger the aperture, the more light enters the lens, the higher (ceteris paribus) the aperture ratio of the telescope and its magnification indicators (see below), and the better it is suitable for working with small, dim or distant astronomical objects (primarily photographing them). On the other hand, with the same type of construction, a larger lens is more expensive. Therefore, when choosing for this parameter, it is worth proceeding from the real needs and features of the application. For example, if you do not plan to observe and shoot remote (“deep-sky”) objects, there is no need to chase high aperture. In addition, do not forget that the actual image quality depends on many other indicators.
Designing and manufacturing large lenses is not an easy and expensive task, but mirrors can be made quite large without a significant increase in cost. Therefore, consumer-grade refracting telescopes are practically not equipped with lenses with a diameter of more than 150 mm, but among reflector-type instruments, indicators of 100-150 mm correspond to the average level, while in the most advanced models this figure can exceed 400 mm.
Focal length
The focal length of the telescope lens.
Focal length — this is the distance from the optical centre of the lens to the plane on which the image is projected (screen, film, matrix), at which the telescope lens will produce the clearest possible image. The longer the focal length, the greater the magnification the telescope can provide; however, keep in mind that magnification figures are also related to the focal length of the eyepiece used and the diameter of the lens (see below for more on this). But what this parameter directly affects is the dimensions of the device, more precisely, the length of the tube. In the case of refractors and most reflectors (see "Design"), the length of the telescope approximately corresponds to its focal length, but in mirror-lens models they can be 3-4 times shorter than the focal length.
Also note that the focal length is taken into account in some formulas that characterize the quality of the telescope. For example, it is believed that for good visibility through the simplest type of refracting telescope — the so-called achromat — it is necessary that its focal length is not less than D ^ 2/10 (the square of the lens diameter divided by 10), and preferably not less than D ^ 2/9.
Max. useful magnification
The highest useful magnification that the telescope can provide.
The actual magnification of the telescope depends on the focal lengths of the objective (see above) and the eyepiece. Dividing the first by the second, we get the degree of magnification: for example, a system with a 1000 mm objective and a 5 mm eyepiece will give 1000/5 = 200x (in the absence of other elements that affect the magnification, such as a Barlow lens — see below). Thus, by installing different eyepieces in the telescope, you can change the degree of its magnification. However, increasing the magnification beyond a certain limit simply does not make sense: although the apparent size of objects will increase, their detail will not improve, and instead of a small and clear image, the observer will see a large, but blurry one. The maximum useful magnification is precisely the limit above which the telescope simply cannot provide normal image quality. It is believed that, according to the laws of optics, this indicator cannot be more than the diameter of the lens in millimetres, multiplied by two: for example, for a model with an entrance lens of 120 mm, the maximum useful magnification will be 120x2 = 240x.
Note that working at a given degree of multiplicity does not mean the maximum quality and clarity of the image, but in some cases it can be very convenient; see “Maximum resolution magnification"
Max. resolution magnification
The highest resolution magnification that a telescope can provide. In fact, this is the magnification at which the telescope provides maximum detail of the image and allows you to see all the small details that, in principle, it is possible to see in it. When the magnification is reduced below this value, the size of visible details decreases, which impairs their visibility, when magnified, diffraction phenomena become noticeable, due to which the details begin to blur.
The maximum resolving magnification is less than the maximum useful one (see above) — it is somewhere around 1.4 ... 1.5 of the lens diameter in millimetres (different formulas give different values, it is impossible to determine this value unambiguously, since much depends on the subjective sensations of the observer and features of his vision). However, it is worth working with this magnification if you want to consider the maximum amount of detail — for example, irregularities on the surface of the Moon or binary stars. It makes sense to take a larger magnification (within the maximum useful one) only for viewing bright contrasting objects, and also if the observer has vision problems.
Min. magnification
The smallest magnification that the telescope provides. As in the case of the maximum useful increase (see above), in this case we are not talking about an absolutely possible minimum, but about a limit beyond which it makes no sense from a practical point of view. In this case, this limit is related to the size of the exit pupil of the telescope — roughly speaking, a speck of light projected by the eyepiece onto the observer's eye. The lower the magnification, the larger the exit pupil; if it becomes larger than the pupil of the observer's eye, then part of the light, in fact, does not enter the eye, and the efficiency of the optical system decreases. The minimum magnification is the magnification at which the diameter of the exit pupil of the telescope is equal to the size of the pupil of the human eye at night (7 – 8 mm); this parameter is also called "equipupillary magnification". Using a telescope with eyepieces that provide lower magnification values is considered unjustified.
Usually, the formula D/7 is used to determine the equal-pupillary magnification, where D is the diameter of the lens in millimetres (see above): for example, for a model with an aperture of 140 mm, the minimum magnification will be 140/7 = 20x. However, this formula is valid only for night use; when viewed during the day, when the pupil in the eye decreases in size, the actual values of the minimum magnification will be larger — on the order of D / 2.
Aperture
The luminosity of a telescope characterizes the total amount of light "captured" by the system and transmitted to the observer's eye. In terms of numbers, aperture is the ratio between the diameter of the lens and the focal length (see above): for example, for a system with an aperture of 100 mm and a focal length of 1000 mm, the aperture will be 100/1000 = 1/10. This indicator is also called "relative aperture".
When choosing according to aperture ratio, it is necessary first of all to take into account for what purposes the telescope is planned to be used. A large relative aperture is very convenient for astrophotography, because allows a large amount of light to pass through and allows you to work with faster shutter speeds. But for visual observations, high aperture is not required — on the contrary, longer-focus (and, accordingly, less aperture) telescopes have a lower level of aberrations and allow the use of more convenient eyepieces for observation. Also note that a large aperture requires the use of large lenses, which accordingly affects the dimensions, weight and price of the telescope.
Penetrating power
The penetrating power of a telescope is the magnitude of the faintest stars that can be seen through it under perfect viewing conditions (at the zenith, in clear air). This indicator describes the ability of the telescope to see small and faintly luminous astronomical objects.
When evaluating the capabilities of a telescope in terms of this indicator, it should be taken into account that the brighter the object, the smaller its magnitude: for example, for Sirius, the brightest star in the night sky, this indicator is -1, and for the much dimmer Polar Star — about 2. The largest magnitude visible to the naked eye is about 6.5.
Thus, the larger the number in this characteristic, the better the telescope is suitable for working with dim objects. The humblest modern models can see stars around magnitude 10, and the most advanced consumer-level systems are capable of viewing at magnitudes greater than 15—nearly 4,000 times fainter than the minimum for the naked eye.
Note that the actual penetrating power is directly related to the magnification factor. It is believed that telescopes reach their maximum in this indicator when using eyepieces that provide a magnification of the order of 0.7D (where D is the objective diameter in millimetres).