Camera compatibility
Camera models that the flash can work with. Note that this parameter is usually indicated in the characteristics very approximately — only camera manufacturers are named, but there is no talk of models as such. Therefore, before purchasing a flash, it makes sense to separately clarify whether it will work normally with your camera — for example, on the manufacturer's website or thematic forums. This is especially true for devices from third-party manufacturers — for such models, the likelihood of problems is somewhat higher than for “native” flash cameras. At the same time, devices from the same company usually have the same requirements for connecting flashes, and therefore this parameter is with a fairly high degree of accuracy allows you to evaluate compatibility.
If the specifications of the flash indicate compatibility with several brands of cameras, this usually means that this model is available in several variations, each of which is designed for a different manufacturer.
It is worth noting that the "non-native" camera and flash may be quite compatible and work fine in most shooting modes. Nevertheless, support for TTL (see below) and a number of other specific functions in this case is usually out of the question, and in general, the reliability and efficiency of this combination is lower than that of a camera with a "native" flash. Therefore, it is better to choose all the same accessories with directly claimed compatibility.
Of t
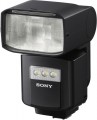
...he compatible cameras currently in use: Canon, Fuji, Leica, Nikon, Olympus, Panasonic, Pentax, Samsung, Sigma, Sony.Guide number
The guide number is the main characteristic that describes the power of the light pulse of the flash. It is described as the maximum distance (in metres) at which, at ISO 100 and f/1 lens speed (aperture 1), a flash is able to illuminate an "average" subject sufficiently for a normal exposure; in other words, at what distance from the flash it will be possible to normally shoot the scene at the specified ISO and aperture.
There are formulas by which, knowing the guide number, you can derive the practical shooting distance for each specific value of sensitivity and aperture. The simplest formula used to calculate the distance at ISO 100 is: S=N/f, where S is the distance, N is the guide number, f is the aperture value. For example, for a guide number of 56 and an f/2.8 lens, this distance would be 56/2.8 = 20 m. Increasing or decreasing sensitivity by a factor of 2 would increase or decrease the specified distance by approximately 1.4 times, respectively. If you need to calculate the distance as accurately as possible, you should refer to more detailed formulas that can be found in specialized sources.
Separately, it is worth noting that the leading numbers of flashes, usually, are indicated by manufacturers for specific focal lengths of lenses. This is due to the fact that the shorter the focal length and, accordingly, the wider the viewing angle, the more light is needed to illuminate the scene being shot and the more powerful the flash pulse should b...e (at the same distance). Therefore, when choosing by the guide number, it makes sense to pay attention to the focal length indicated by the manufacturer and select a model with a power reserve — especially since guide numbers are often prescribed for rather “long-range” lenses (with a focal length of about 80-100 mm in equiv. 35 mm).
Reload time
The time it takes the flash or generator (for studio flashes) to prepare for the next flash. The smaller it is, the better. This parameter is especially important for continuous shooting, when the interval between frames is small: if you often shoot in this mode, you should look for a flash with the shortest possible recycle time. Also note that the characteristics usually indicate the shortest recharge time; in some operating modes, it may be significantly more than stated.
Number of impulses
The number of flashes that the flash can fire without recharging the battery or changing batteries (see "Power"). This parameter is very approximate, because. in fact, it strongly depends on a number of factors: pulse duration, use of the display and its backlight (if any, see below), autofocus backlight (see "Features"), etc., and with replaceable batteries — even and on their quality. Often, manufacturers indicate in the characteristics the “perfect”, the maximum possible number of pulses — i.e. with their minimum duration, non-use of additional functions and even the optimal temperature regime for the battery. In reality, this figure may be lower. Nevertheless, the data indicated in the characteristics makes it quite possible to evaluate the battery life of the flash and even compare different models with each other.
TTL
Flash units with TTL support. TTL is an abbreviation for "through the lens", i.e. "through the lens"; this is the name of the method of measuring exposure by the amount of light that passes directly through the camera lens.
In digital photography, TTL works like a pre-flash: before the main exposure, the flash fires one or more test flashes. The amount of light coming from the object being filmed is measured by special sensors, based on these data, the control electronics sets the necessary shooting parameters, after which the actual exposure takes place. This allows you to fine-tune the camera and get an image of optimal quality. The interval between the test and operating pulses is so small that it may not be visible to the naked eye at all (especially when the flash is synchronized with the front curtain or with a slow shutter speed).
Many modern camera manufacturers have their own developments and varieties of TTL technology, respectively, differing in name: for example, Canon has E-TTL and E-TTL II, Nikon has D-TTL (in early models) and i-TTL (in later ones) , Pentax has P-TTL, etc. Support for one or another variety is directly related to the compatibility of the flash with cameras (see above), and different formats are usually not compatible with each other.
Beam angle
The angle at which the main beam of light from the flash diverges. This parameter is not expressed directly, in degrees, but in terms of the focal lengths of the corresponding lenses, in millimetres: for example, a beam angle of 105 mm corresponds to the angle of view of a lens with the same focal length (35 mm equivalent). This makes it easy to select a flash for specific optics, so that it most effectively illuminates all the space in the frame. And the most advanced modern flashes can have a variable dispersion angle, allowing you to adjust them to different shooting features; this feature is especially useful when using zoom lenses. Changing the angle of dispersion is carried out by a movable lens installed in the flash head, it can be carried out both automatically and manually (for more details, see "Functions and Capabilities").
Illumination angle
The angle of illumination provided by the on-camera light source (see "Type").
A large illumination angle, on the one hand, allows you to simultaneously cover a larger area, which is especially important when shooting long shots (at short focal lengths). On the other hand, to achieve sufficient brightness, this requires a large power of light sources, which accordingly affects the price and power consumption of the device. A small coverage angle, in turn, gives a small spot size of the light, but it allows you to achieve good brightness at a relatively low power.
Colour temperature
The colour temperature of the light emitted by the device. Most of the classic flashes have a standard colour temperature of 5500-5600 K, so this parameter is usually not given for such lamps. But on-camera light sources (see "Type") can differ markedly in this indicator, and we will talk about them.
Colour temperature characterizes the overall shade of the glow emitted by the device. At the same time, an interesting nuance is that low values \u200b\u200bcorrespond to colours that a person perceives as warm; and as the colour temperature rises, the hue shifts more and more towards cool colours. For example, for a 60 W incandescent lamp, the light of which has a pronounced yellowish colour, this parameter is approximately 2700 K, and for a fluorescent lamp that produces “daylight” light with a bluish tint, this parameter is about 7000 K.
In general, the colour temperature of lighting is one of the most important parameters when shooting: it determines the colour balance of the image "seen" by the camera. In camera settings, this indicator is called "white balance". It can also be determined automatically, however, for the most reliable colour reproduction, it is still desirable to set its values according to the known colour temperature of the lighting.
Specifically, in on-camera light sources, the colour temperature can be either constant or adjustable. In non-adjustable models, the value of this parameter is the same as in most flash units...— 5500 K, which corresponds approximately to neutral white. Adjustment also provides the possibility of at least lowering the colour temperature — usually up to 3200 K, which approximately corresponds to warm white light. In addition, occasionally there are models in which the maximum colour temperature exceeds 5500 K, reaching 6000 K and even more.
The ability to change the colour temperature can be useful not only for shooting as such, but also for “matching” the lamp with other light sources. The fact is that if several simultaneously used light sources have different colour temperatures, the colour rendition on the scene being shot will be unreliable — to the point that a monochromatic object illuminated by different lamps from different sides may look like a two-colour one. One way to avoid this is to set the colour temperature of the on-camera light to match the ambient light. However, it is worth noting here that the methods of adjusting the shades and the accuracy of such adjustment may be different. The most advanced option is to use two sets of LEDs, with a warm and cold shade of glow; By changing the brightness ratio between these sets, you can also change the overall colour temperature — and quite smoothly and accurately. Another way is to use coloured diffusers (see below), but here the adjustment is stepped, with fixed values (with and without a diffuser). In some devices, both of these methods are combined.
Features
—
Autofocus assist light. The presence of an auxiliary illumination function in the flash for the camera's autofocus system. Modern cameras in the vast majority use the so-called passive autofocus systems, which have one serious drawback: very low efficiency in low light and/or low contrast of the subject being photographed. Autofocus assist light is designed to solve this problem: before focusing, the scene is illuminated by a separate lamp, located, in this case, directly in the flash body. This ensures a sufficient amount of light for normal autofocus operation. Most often, the backlight lamps give off light of a characteristic reddish hue, but some advanced models use infrared illumination - invisible to the eye, but perceived by the camera. In addition, backlight systems can use a special light pattern instead of a solid beam, which further simplifies the task of autofocus systems. In any case, the presence of this function is especially important given that the flash is often used as a light source in low light.
— On-camera control. The ability to change the flash settings using the controls of the camera to which it is connected. In some cases (for example, with a wireless connection), this is much more convenient than switching attention from the camera to the flash.
—
Automatic zoom. The ability to automatically change the flash light scattering angle. For the scattering angle
..., see the corresponding point above, but here we note that this function provides synchronization between the flash and the lens: when the focal length of the lens changes, the scattering angle automatically changes. This ensures the most effective illumination of the scene and at the same time saves you from having to manually readjust the flash each time to the changed viewing angle.
— Manual zoom. The ability to change the flash spread angle (see "Light spread angle") manually. This function expands the possibilities for "fine" adjustment of operating parameters and allows you to set parameters that are not available with automatic zoom (see above). In addition, it will be useful if you have to use several fixed lenses with different focal lengths - the flash can be easily adjusted for each of them.
— Operation in master mode. The ability to operate the flash as a master for a system of several flashes. The entire system is controlled via the master flash, the parameters of the slave flashes are set, and the command to fire is given (note that the master flash itself may not give a pulse at all). If you plan to shoot using a system of several flashes, you will definitely need a model with this function — without it, creating a system is impossible. Of course, the master and slave flashes must be mutually compatible; this point should be clarified separately.
— Slave mode. The ability to operate the flash as a slave in a system of several flashes. In this mode, the device is connected to the master flash and is triggered by a command from it. For more information on flash systems, see "Master mode operation" above.
— Radio synchronizer. A device designed for wireless control of a flash or a set of flashes (if each of them has its own receiver). Usually it is a separate module installed in a hot shoe; upon a command to trigger, this module sends a radio signal to all receivers tuned to it, ensuring synchronous triggering of the flashes. At the same time, some models of lamps with this function are capable of receiving via radio not only the trigger signal, but also the operating parameters (primarily the duration and power of the pulse).