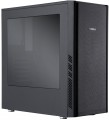
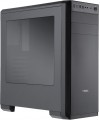
5.25" bays
The number of 5.25" form factor bays provided in the case design. Such bays are made only external, that is, they can be accessed from the outside without opening the case (unlike 3.5", see the corresponding glossary items). Today, 5.25" bays are mainly used for installing optical disk drives, internal hard drives in removable pocket adapters (Mobile Rack), and sometimes additional fans. Also, 3.5" devices can be installed in such bays using special adapters. ". Most cases are equipped with
1 5.25" bay or
two bays. But there are
models with 3 or more bays, as well as
cases without external bays.
Screwless
The ability to use special latches (instead of screws) to mount peripheral devices in 3.5" and 5.25 bays, as well as cards in expansion slots. This
screwless mounting greatly simplifies the installation and replacement of system components.
Fans (front)
The number of fan slots
on the front of the case, and the size of the fans these slots are designed for. The presence of the fans themselves in the kit should be specified separately.
The larger the fan, the more advanced it is considered: a large diameter allows you to work efficiently at relatively low speeds, which reduces the noise level and energy consumption. Case fans are available in several standard diameters; specifically for the front panel, the size
up to 92 mm is considered relatively small,
120 mm — medium,
140 mm — large, and in the most advanced solutions, fans of
180 mm or even more can be installed.
Also note that most often the holes for installing fans are designed for one specific size, however, there are also “multi-size” seats, for 2-3 options. Moreover, these options may differ both in diameter and in quantity: for example, it may be possible to install two 140 mm fans or three 120 mm fans.
Fans (top)
The number of fan slots
on the top side of the case, and the size of the fans these slots are designed for. The presence of the fans themselves in the kit should be specified separately.
The larger the fan, the more advanced it is considered: a large diameter allows you to work efficiently at relatively low speeds, which reduces the noise level and energy consumption. Case fans are available in several standard diameters, and the seats under them can be designed for both one and several sizes — for example, 120 / 140 mm. At the same time, in some models, the available number of seats also depends on the chosen size: for example, there are gaming cases where you can install either one 180 mm fan or four 120 mm fans at once.
Fan mounts total
The total number of places for installing fans provided in the chassis design.
The more performant the system, the more components it includes — the more powerful cooling it will need; therefore, the number of places for fans, usually, is directly related to the size and purpose of the case. It is also worth considering that with the same number, the installation location of individual fans may be different — behind, on the side, on top, etc.
Placement
The location of the front set of connectors provided in the case. Such connectors can be located
on the front panel,
on the side wall or
in the upper part of the case. The first two options are found in all case form factors (see above), while the top placement is considered optimal for tower solutions, originally designed for installation under the table.
Front panel
-
Lattice. The grille on the front panel of the case often looks good and allows you to better supply the cooling system fans with more outside air. Decorative lighting is often placed behind the perforated panel, which improves the appearance of the case.
-
Blank. The competitive advantages of cases with a blank front panel are improved noise insulation and effective protection of the internal space of the computer from dust.
-
Glass. The veil of mystery of what is happening inside the computer system unit is lifted by cases with a glass front panel. Tempered glass as a “facade” material is used both in the form of a solid window and in the form of a glass grille with RGB backlighting. And in combination with the glass side window, it turns the body into
an “aquarium”.
Side panel window
The presence of
a viewing window on the side panel of the case, allowing you to see the “filling” without opening the case. It gives the case a stylish appearance; in addition, it allows you to install a lighting system inside, which is appreciated by gamers compared to
case models without a window.
The materials for manufacturing the windows on the side panel are:
- Acrylic. Acrylic or plexiglass is an inexpensive material of relatively light weight, which, however, actively collects scratches and can be deformed when exposed to high temperatures.
- Strained glass. Tempered glass panels have excellent transparency, are resistant to scratches and are easy to clean from dirt. At the same time, they weigh a lot and can break to pieces if not handled carefully.
- Metal grid. Wire mesh is a simple type of window material used on the side panel of a cabinet. It allows air to pass through and provides additional heat removal from the internal components of the system unit; dust can leak through the mesh overnight.
More features
—
Front cover. A hinged cover that completely or partially covers the front panel. Gives the computer a neat appearance, hiding connectors and external slots under a solid, uniform surface and performs the function of child protection.
—
Panel display. A display on the front or side panel of the case, used to display various service information: the current processor frequency, data on the system temperature, cooling operating mode, etc. Various important data can be displayed on the display without reference to what is happening in the software part of the computer.
—
Video card holder. A design solution for supporting a video card inside the case. Specialized stands or holders prevent the graphics adapter from sagging over time and reduce the load on the PCI-E slot of the motherboard. The fact is that many models of modern video cards have gained some weight - the holders are designed to compensate for their weight. Stands are available both as built-in solutions and as separate accessories that can be installed inside the case independently.
—
Side panel lock. The presence of a special lock on the removable side panel of the case. Such a lock prevents unauthorized access to the internal volume of the system unit.
—
Noise isolation. Availability at the case of
...additional sound insulation. This can be either a special coating on the inside, or other, more specific solutions (for example, damping systems on “seats” for individual components that reduce the level of vibrations transmitted to the body). Anyway, this feature helps to reduce the noise level emitted by the system — sometimes quite significantly.
— Removable basket for HDD. The presence in the design of the case of a removable basket for the inner periphery of the 3.5 "form factor (in the vast majority of cases these are hard drives, hence the name). Such a basket facilitates assembly due to the fact that it is much easier to remove it and install a hard drive inside than mount it in a non-removable compartment inside the case; this moment is especially useful if you plan to install several hard drives in the system.
— Docking station for HDD. Built-in docking station for quick connection of internal hard drives. In fact, this function allows you to connect an internal HDD as an external one: the docking station connector is located outside the case and is equipped with quick-release fasteners for easy connection.
— Concealed wiring. The ability to run wires from the power supply on the back of the motherboard (if we take the side where the processor and slots for expansion cards are located as the main one). Thus, the space on the main side of the "motherboard" is freed from wires, which, in particular, has a positive effect on the cooling efficiency.
— The window for installing the cooling system(Cooling system) for CPU. The presence of a separate window in the case opposite the CPU fasteners. The mounting system is located on the back of the motherboard, and usually, in order to change it, you need to remove the entire "motherboard"; the Cooling system installation window saves the user from such a need and greatly simplifies the installation and change of Cooling system.
