
Comparison FIFINE K420 vs Lorgar Rapax 701
Add to comparison | 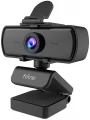 | 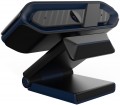 |
|---|---|---|
| FIFINE K420 | Lorgar Rapax 701 | |
| Outdated Product | from $104.06 | |
| User reviews | ||
| TOP sellers | ||
Resolution 2.5K at 60 FPS. Autofocus. Privacy shutter. | ||
| Features | computer | computer |
Matrix and video | ||
| Megapixels | 4.0 | 4.0 |
| Full HD filming (1080p) | 1920x1080 px 60 fps | |
| Quad HD filming | 2560x1440 px 30 fps | 2560x1440 px 30 fps |
| Focus | fixed | automatic |
| Horizontal viewing angle | 108 ° | 75 ° |
General | ||
| Features | microphone protective shutter monitor mount tripod mount (1/4" thread) | microphone protective shutter monitor mount tripod mount (1/4" thread) |
| Indicators | activity | |
| PC connection | USB-A | USB-C |
| Cable in box | built-in | USB A – USB C |
| Cable length | 2 m | |
| Dimensions | 105x63x47 mm | |
| Color | ||
| Added to E-Catalog | april 2024 | january 2023 |


Compare FIFINE K420 and Lorgar Rapax 701
You may be interested in
My comparisons
FIFINE K420 often compared


Lorgar Rapax 701 often compared


Glossary
Full HD filming (1080p)
Further, after HD 720p, the development of high definition standards. Provides a standard frame size of 1920x1080; in addition, this category includes webcams that support 1600x1200 video — this resolution does not formally apply to Full HD (1080p), but is comparable to it in detail. Anyway, cameras of this standard are quite advanced — in particular, they already allow showing documents and other objects with small details in the frame.
Focus
Focus method — focus — provided in the design of the camera.
The simplest and most common option is manual focus; it requires some setup steps, but does not cause any particular difficulties, besides, it allows you to set the sharpness as you wish, without relying on automation. Autofocus, in turn, saves the user from having to fiddle with the settings, however, it is also more expensive. In addition, autofocus systems may not work as you would like, and they still sometimes have to be adjusted manually (however, such a need is extremely rare).
The simplest and most common option is manual focus; it requires some setup steps, but does not cause any particular difficulties, besides, it allows you to set the sharpness as you wish, without relying on automation. Autofocus, in turn, saves the user from having to fiddle with the settings, however, it is also more expensive. In addition, autofocus systems may not work as you would like, and they still sometimes have to be adjusted manually (however, such a need is extremely rare).
Horizontal viewing angle
The viewing angle determines, first of all, how wide the field of view of the camera is, what area of the scene being shot falls into the frame. Accordingly, a wide viewing angle allows you to capture more space and the lower the likelihood that something of what is happening will be behind the scenes. On the other hand, it should be taken into account that a strong increase in viewing angles leads to distortions of the “picture”, especially at the edges, as well as to a decrease in the size of visible objects and a decrease in detail.
Indicators
Types of indicators (usually light) provided in the design of the camera. In modern models, there are (separately or together) two types of indicators:
— Nutrition. An indicator that indicates that everything is in order with the power supply. On some models, this indicator only works when the camera is turned on and ready to use, on others it can also work in standby mode — for example, it will glow in a different light than when the camera is on.
— Activities. An indicator that indicates that the camera is shooting video — and, accordingly, it is being recorded or broadcast on the Internet. Such an indicator makes it easier to keep track of the shooting mode and avoids unpleasant situations, such as accidentally broadcasting to the Internet from a camera that you forgot to turn off.
— Nutrition. An indicator that indicates that everything is in order with the power supply. On some models, this indicator only works when the camera is turned on and ready to use, on others it can also work in standby mode — for example, it will glow in a different light than when the camera is on.
— Activities. An indicator that indicates that the camera is shooting video — and, accordingly, it is being recorded or broadcast on the Internet. Such an indicator makes it easier to keep track of the shooting mode and avoids unpleasant situations, such as accidentally broadcasting to the Internet from a camera that you forgot to turn off.
PC connection
Ways to connect a webcam to a computer.
– USB-A. A camera connection option that involves transmitting video and audio via a classic full-size USB-A connector. Note that such ports may belong to different versions (2.0, 3.2 gen1, 3.2 gen2), but they are quite compatible with each other. The higher the USB version, the faster the data is transferred, which provides an excellent quality picture in high frame resolution.
– USB type C. A noticeable advantage of USB type C over the classic USB-A connector is its double-sided design, which allows you to connect the plug to either side. In addition, this connector usually uses a USB 3.1 gen1 or 3.1 gen2 connection, thereby providing high data transfer speeds. This is important when conducting video conferences in Full HD resolutions and higher.
— USB + Mini-jack 3.5. In this option, a connection via a USB port is used to transmit the video stream from the webcam, and a 3.5 mm audio jack (a round socket with a diameter of 3.5 mm, also called Mini-jack) is used to transmit audio.
– HDMI. A universal, comprehensive interface for transmitting high-resolution video and multi-channel audio in digital format from a webcam. Data exchange is carried out over a single cable, which simplifies connecting the camera to a computer.
– USB-A. A camera connection option that involves transmitting video and audio via a classic full-size USB-A connector. Note that such ports may belong to different versions (2.0, 3.2 gen1, 3.2 gen2), but they are quite compatible with each other. The higher the USB version, the faster the data is transferred, which provides an excellent quality picture in high frame resolution.
– USB type C. A noticeable advantage of USB type C over the classic USB-A connector is its double-sided design, which allows you to connect the plug to either side. In addition, this connector usually uses a USB 3.1 gen1 or 3.1 gen2 connection, thereby providing high data transfer speeds. This is important when conducting video conferences in Full HD resolutions and higher.
— USB + Mini-jack 3.5. In this option, a connection via a USB port is used to transmit the video stream from the webcam, and a 3.5 mm audio jack (a round socket with a diameter of 3.5 mm, also called Mini-jack) is used to transmit audio.
– HDMI. A universal, comprehensive interface for transmitting high-resolution video and multi-channel audio in digital format from a webcam. Data exchange is carried out over a single cable, which simplifies connecting the camera to a computer.
Cable in box
Detachable cable design provides additional options for connecting a WEB-camera: the bundled cord can be changed to a longer or shorter one. Also , the detachable cable is very convenient for storage and transportation.
The built-in cable is always in place - you can lose it only with the WEB-camera itself. On the other hand, a fixed wire cannot be quickly replaced with another one (for example, a longer one); and if it is damaged, you will have to carry the WEB-camera for repair or change it entirely.
The built-in cable is always in place - you can lose it only with the WEB-camera itself. On the other hand, a fixed wire cannot be quickly replaced with another one (for example, a longer one); and if it is damaged, you will have to carry the WEB-camera for repair or change it entirely.