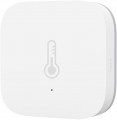
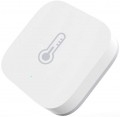
Standard installation method assumed by the sensor design.
-
Ceiling. Ceiling mounting is somewhat more complicated than wall mounting, but from a height the sensor can cover a large space. In addition, it can be installed above any point in the room - both close to the walls and away from them.
— Ceiling (built-in). A type of ceiling model, designed for installation in such a way that the body is completely recessed inside, and only a small part of the sensor is located outside.
Built-in solutions fit harmoniously into the interior, but are more complex in terms of installation and reinstallation.
—
Wall-mounted. Wall mounting requires some preparation (often you have to drill holes for fasteners), but in general it is somewhat simpler than ceiling mounting. The disadvantage of this option is the limited possibilities for choosing the location of the sensor in the room.
— Wall-mounted (built-in). An option with the sensor
being built into the wall - so that only a small part of the device is located outside, and its body is completely recessed into the wall. Often, it is necessary to provide a niche in the wall for such sensors at the stage of renovation of the room.
— Wall/ceiling. Devices that allow both installation options described above; For this purpose, the design provides f
...or an appropriate universal fastening. Thanks to it, the customer can choose the best option depending on the situation, and even change the installation method if the need arises.
— Tabletop. Devices installed on a table or any other flat surface. This installation method is as simple as possible; in addition, it allows you to easily move the sensor from place to place. At the same time, desktop installations in general are not reliable, so they are extremely rare.
— Tabletop/wall-mounted. Sensors that provide both tabletop and wall mounting. These are mainly small flat household solutions.
- On the windows. An installation method found exclusively in individual break sensors with a contact operating principle. As a rule, such sensors are capable of tracking not only glass breaking, but also more or less strong impacts on it, and sending a signal in advance.
— On the body of the spotlight. Mounts directly to the body of a spotlight or other lighting fixture. Found exclusively in light sensors. This installation has a number of advantages over remote mounting of the sensor: firstly, the entire “sensor + spotlight” system is as compact as possible, and secondly, you can get by with a minimum length of connecting wires. On the other hand, not every spotlight has the ability to mount a sensor; it wouldn’t hurt to clarify this point in advance.
- Corner. Another installation option, typical primarily for light sensors (see “Purpose”). In this case, “corner” does not mean “in the corner”, but “on the corner” - the sensor is placed on the corner of a building, fence, wall, etc. Moreover, the horizontal coverage angle (see below) in such devices is usually 270° - in other words, the sensor covers the entire space around it, except the wall itself.
— In the door frame/window frame. Installation method used in opening sensors. Such models usually consist of a pair of devices: the sensor itself, installed on a door or window opening, and a tag placed on the door/window. This device works due to the fact that when the door/window is opened, the tag moves away from the sensor.
- Floor-standing. A variant found exclusively in flood sensors. These sensors are originally designed to detect moisture on the floor, so that's where they are placed; There are practically no exceptions to this rule.
